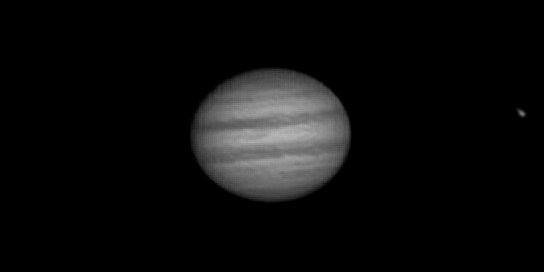
Amazing! Especially Jupiter. Good way to bump this thread.
Thank you so much LN! I’ve been meaning to get back into it forever but the older I get, the less energy I seem to have to haul all the heavy equipment to the field and set it up and stay up till the wee hours of the morning. But I went to visit my parents in Ontario (all the way to the other side of Canada) where I have my 10”LX200 meade scope and with a week off and warm nights, I just couldn’t resist taking out my old scope. I don’t get much chances to use it since I usually visit around Christmas time and unlike when I was a teenager where I would brave the -20 degrees celcius temperatures all night long, I just can’t do it anymore. I have a much smaller scope here in Vancouver which I haven’t used since the last eclipse but I’m feeling more inspired now!
")
If anyone is interested I would be happy to one day write a mini tutorial on how I capture these images but for now here is the very quick version for those who may want to venture into the awesome world of astrophotography.
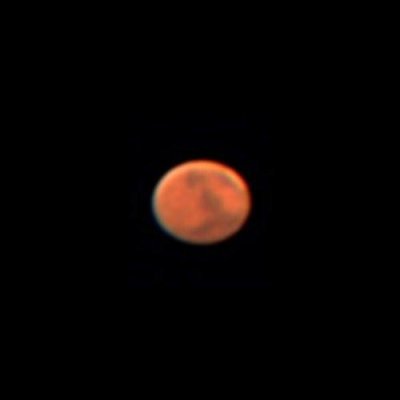
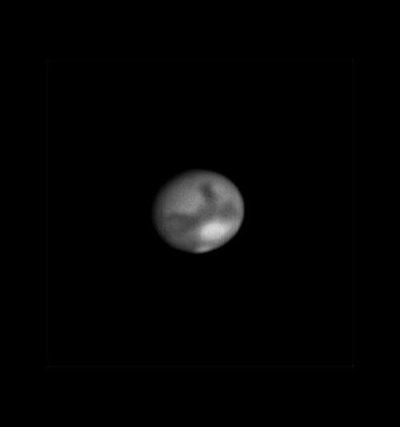
These photos originally started as video clips. I use a webcam style camera adopted to fit a telescope. I have a black and white one (which is usually much better than color) and have a color cam as seen in the first mars pic.
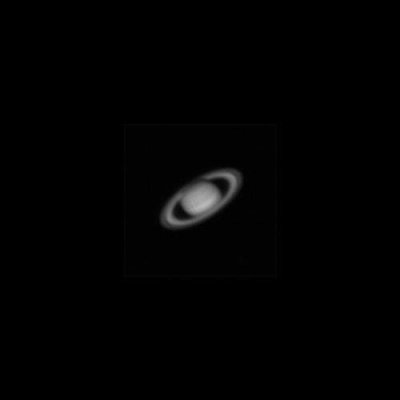
Once I Center the planet in the field of view and focus it on my camputer screen with he camera attached to the scope, I adjust the exposure, gain (much like the iso, the more gain used the more sensitive the sensor is but also the more noise that is added to the photo). And finally I adjust the frame rate of the video. It’s really a fine balance between all these adjustments and good focus to get a good image. Also, good seeing (ie the atmosphere most not be very turbulent) and good optics colimation (alignment of the lenses and mirrors) is a must for getting a good picture.
I capture a video clip of the planet (usually between 1-2 minutes long). Anything longer than that will cause blurring of the final image due to the planet’s rotation. This is especially true for Jupiter since the planet does one rotation in just 10 hours!
Once the video is captured I split the video into its individual frames. So for example a 2 minute video at 20 frames per second will give me a total of 2400 individual pictures. Since you are observing through the turbulent atmosphere (think twinkling stars), many of those pictures will be quite blurry but you may have brief moments of a very steady atmosphere so you get sharper images. You choose all those images with the sharpest seeing and discard the rest of the blurry images. Once you have selected your best images, you use a program called registack 6 to stack all those good frames into one picture. The more pictures the better. There for the more pictures you stack together the better the signal to noise ratio will be and the sharper and less noisy your image will be. Once the images are stacked, you can run a wavelet program to sharpen the image and you would be amazed at how much detail comes out of the planet.
That is the short and sweet of it but if there is interest in learning this more (if there are members here with scopes ever considering photographing the solar system), I’ll be happy to write a detail step by step tutorial and tips on getting good photos. The ones I posted above are so so, but I really felt I had to relearn how to do this especially the processing!
Once you get a decent planet pic, it’s just truly an awesome feeling!
Cheers!
PS: One can also do deepsky imaging of galaxies, star clusters and nebula, but that is a whole different animal involving very long exposures and making sure your scope is tracking very accurately which usually involves using a guide star to manually make adjustments of your telescope’s tracking during the exposure. I’ve taken a few very mediocre deepsky shots but I have yet to master it or have the patience to accomplish this.